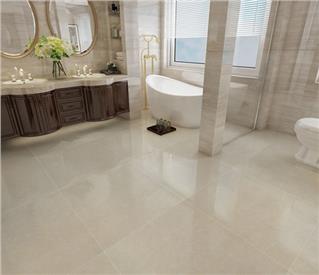
Bathroom wall treatment can be very diverse, at present, mosaic tile is a kind of decorative material that many people prefer, its color is very rich, and its visual effect can give people a kind of beautiful impact. Toilet mosaic tile can be more diversified in the shape of the bathroom, so that the walls will be more beautiful and elegant. Using mosaics in bathrooms also requires proper tiling methods. Of course, many people are the first time to lay tiles. They have little experience, so they don't know how to pave mosaic tiles with different grades and effects. Hanseceramictile.com will detail you how to correctly install mosaic tiles in the toilet/bathroom.
Best Tools For Laying Mosaic Tiles In Bathroom
- Drill
- Utility knife
- Hammer
- Grout float
- Nippers
- Bucket
- Grout sponge

How To Lay Mosaic Tiles In The Bathroom – Best Steps For Installing Mosaic Tiles
Step 1 - Brush Glue
Brushing glue is the key to laying mosaic tiles. Prepare to mix according to the proportion of strong tile adhesive. Use a plastering knife to paste the tiles on the wall. Pay attention that the amount of application should not be too much.
First, apply the glue on the wall, and then use a smooth knife to apply the glue evenly. Generally speaking, the thickness of glue is about 20 mm. According to the weather conditions, the mixing of the adhesive mortar shall be controlled within 2-3 hours.
After applying the glue according to the drawing, align the splicing drawing with the gap. Use knife or putty knife to inlay mosaic tightly. Or use a flat, thick board to place it on the mosaic tile surface and hit it evenly with a rubber hammer to ensure a firm adhesion.
Step 2 - Check The Paving
After laying a certain range of mosaic, check the pavement condition. First of all, the gap between tiles and tiles must be defined as a uniform width. This will depend on the use of a small gray spatula to adjust the mortar joints. This is the most patient process, but it is the most important link in the process of bathroom mosaic tiles paving.

Step3 – Applying The Grout
After the inspection, when the water has dried properly and has the initial strength, start the grout sealing, prepare the required grouting, and pour the grouting into the inlay gap with the plasterer. Please note that the area of the rubber scraper does not exceed 2 square meters. The grout sealant shall be evenly applied to the mosaic surface to ensure that all mortar grouts are completely filled and free of excess residue. During grout sealing, it shall be noted that after 20-25mm of joints are twisted with wet cloth, the mosaic surface of grout sealing shall be slightly dried.
 EN
EN FR
FR PT
PT AR
AR
