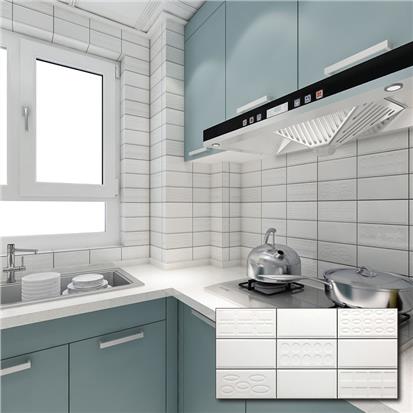
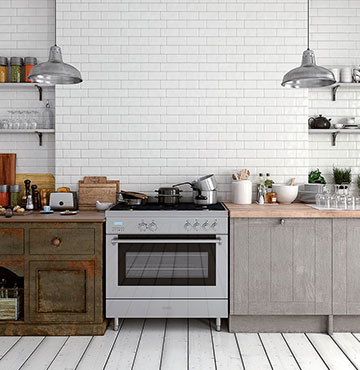
EN
EN FR
FR PT
PT AR
ARSubway tile backsplashes are a popular choice for homeowners looking to add a stylish and functional element to their kitchen or bathroom. In this article, we will walk you through the step-by-step process of installing a subway tile backsplash, from pre-installation preparation to post-installation care.
Benefits of installing subway tile backsplash
Not only do subway tile backsplashes add a modern and sleek aesthetic to any space, but they are also incredibly durable and easy to clean. Plus, they are a cost-effective way to update your home's design without breaking the bank.
Tools and materials needed for installation
Before you get started, you'll need a few key tools and materials. These include:
Tape measure
Level
Tile saw or tile cutter
Trowel
Grout float
Tile spacers
Adhesive
Grout
Sponge
Bucket

Pre-Installation Preparation
Measuring the area of the backsplash
The first step in installing a subway tile backsplash is to measure the area you want to cover. Use a tape measure to determine the length and width of the wall, and then multiply these figures to get the total square footage.
Calculating the number of tiles needed
Once you have your measurements, you can calculate how many tiles you'll need. Keep in mind that it's always a good idea to purchase a few extra tiles in case of mistakes or breakage.
Cleaning the wall surface
Before you start installing your tiles, it's important to make sure the wall surface is clean and free of debris. Use a damp cloth to wipe down the area and remove any dust or dirt.
Marking the layout of the tiles
Using a level, mark a horizontal line along the bottom of the backsplash area. This will serve as a guide for your first row of tiles. Then, use a tile spacer to mark vertical lines where each tile will be placed.
Choosing Subway Tiles
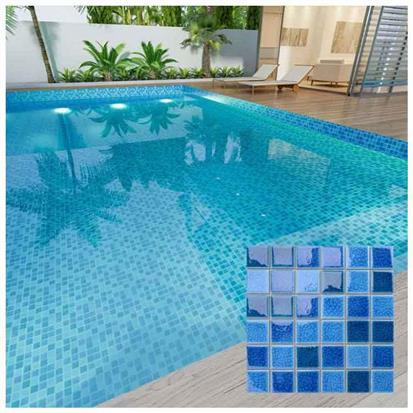
Types of subway tiles available
There are several different types of subway tiles to choose from, including ceramic, porcelain, glass, and natural stone. Each material has its unique properties, so be sure to do your research before making a decision.
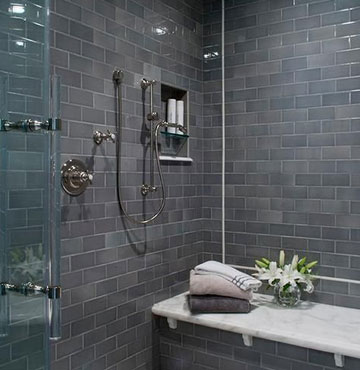
Choosing the right color and pattern
Subway tiles come in a variety of colors and patterns, so you're sure to find something that fits your design aesthetic. When choosing a color, consider the overall look of your space and whether you want to make a bold statement or keep things neutral.
Tile sizes and spacing options
Subway tiles come in a range of sizes, from small mosaic tiles to larger 4x8-inch tiles. The spacing between each tile can also vary depending on your preference, with options ranging from no spacing to 1/8 inch.
Cost considerations
The cost of your subway tile backsplash will depend on a variety of factors, including the type of tile you choose, the size of your space, and whether you plan to install it yourself or hire a professional.

Installing the Tile Backsplash
Applying adhesive to the wall
Using a trowel, apply a layer of adhesive to a small section of the wall. Be sure to spread it evenly and only apply enough for a few tiles at a time.
Placing the first tile
Starting at the bottom of your backsplash area, place your first tile along the horizontal guide line you marked earlier. Use a level to make sure it is straight.
Applying spacers and continuing the pattern
After placing your first tile, use a tile spacer to create a small gap between it and the next tile. Continue placing tiles in this manner, using spacers between each one to ensure even spacing.
Cutting tiles to fit around outlets and corners
As you approach outlets or corners, you may need to cut tiles to fit the space. Use a tile saw or tile cutter to make precise cuts, and be sure to measure twice before cutting to avoid mistakes.
Once you have cut your tiles to fit, continue placing them on the wall in the same manner as before, using spacers between each one.
Grouting the Tile
Preparing the grout
After your tiles have been set for at least 24 hours, it's time to apply the grout. Mix your grout according to the manufacturer's instructions, being careful not to add too much water.
Applying grout to the tile surface
Using a grout float, spread the grout evenly over the surface of the tiles, making sure to fill all of the gaps between them. Work in small sections at a time to ensure the grout doesn't dry out too quickly.
Cleaning excess grout off the tiles
Once you have applied the grout, use a damp sponge to wipe away any excess from the surface of the tiles. Be sure to rinse your sponge frequently to avoid spreading grout around.
Finishing touches on the grout
After you have removed most of the excess grout, use a clean, dry cloth to buff the surface of the tiles and remove any remaining haze. Allow the grout to dry completely before using the backsplash.

Post-Installation Care
Waiting period before cleaning the backsplash
After installing your subway tile backsplash, it's important to wait at least 72 hours before cleaning it. This allows the grout to fully cure and prevents it from cracking or becoming discolored.
Recommended cleaning methods for subway tile
To keep your subway tile backsplash looking like new, use a mild cleaning solution and a soft cloth to wipe it down regularly. Avoid using harsh chemicals or abrasive sponges that could scratch the surface.
Tips for maintaining the backsplash
To prevent damage to your backsplash, avoid placing heavy objects on it or using abrasive cleaners. If you do notice any chips or cracks, be sure to repair them as soon as possible to prevent further damage.
Common Mistakes to Avoid
Not measuring correctly
One of the biggest mistakes you can make when installing a subway tile backsplash is not measuring correctly. Take your time and double-check your measurements to avoid costly mistakes.
Using too much or too little adhesive
Using too much adhesive can cause your tiles to slip or slide while using too little can cause them to come loose over time. Follow the manufacturer's instructions carefully to ensure you are using the right amount.
Misplacing tiles or not using spacers
Failing to use spacers or misplacing tiles can result in an uneven or crooked backsplash. Take your time and be patient to ensure each tile is placed correctly.
Not cleaning excess grout properly
If you leave excess grout on the surface of your tiles, it can dry and become difficult to remove. Be sure to clean it up thoroughly before it has a chance to dry.
Frequently Asked Questions
How long does it take to install a subway tile backsplash?
The time it takes to install a subway tile backsplash will vary depending on the size of your space and whether you plan to install it yourself or hire a professional. However, most installations can be completed within a day or two.
What tools are needed for installation?
To install a subway tile backsplash, you'll need a few key tools, including a tape measure, level, tile saw or tile cutter, trowel, grout float, tile spacers, adhesive, grout, sponge, and bucket.
How do I choose the right grout color?
When choosing a grout color, consider that Another common question is whether subway tile can be installed over existing tile. The answer is yes, but it's important to ensure that the existing tile is in good condition and firmly attached to the wall. If the existing tile is loose or damaged, it should be removed before installing the new subway tile backsplash.
In conclusion, installing a subway tile backsplash is a great way to enhance the look of your kitchen or bathroom. By following the steps outlined in this guide, you can tackle the project with confidence and achieve professional-looking results. Remember to take your time with each step and avoid common mistakes like measuring incorrectly or not cleaning excess grout properly. With the right tools, materials, and knowledge, you can enjoy the benefits of a beautiful and functional subway tile backsplash in no time.


 16
16


- 16