EN
EN FR
FR PT
PT AR
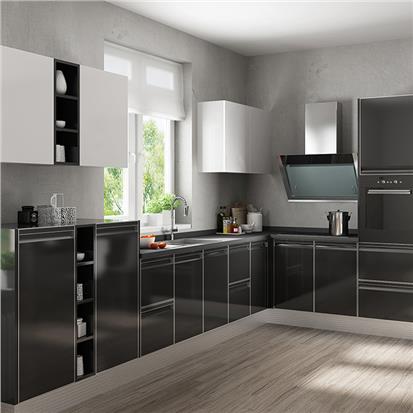
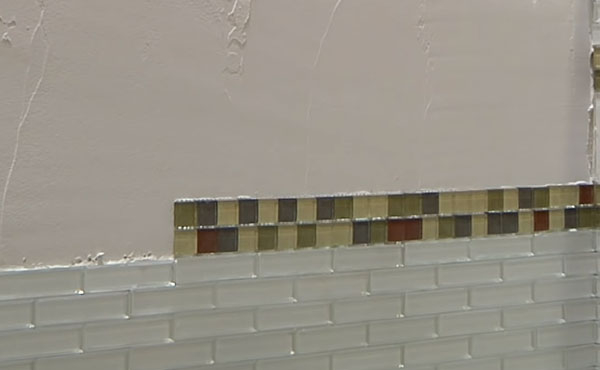
ARGlass tile is a beautiful material that can bring light and shine to any room in a house, creating a clean modern-yet-classic look. The use of glass tile continues to gain popularity in both residential and commercial projects. Once only used exclusively as an accent, these tiles are now being used to cover much wider areas. Learn how installing glass tile backsplash is not the same as installing other types of tile. The new glass-tile kitchen backsplash installation is a great DIY project that brings contemporary class to any kitchen remodel. In this article, our informative top 6 tips on how to install glass tile backsplash in kitchen will help you to understand the challenges of making a glass tile installation look great.
6 Tips On How To Install Glass Tile Backsplash In Kitchens
1. Surface preparation is key
As with any adhered installation, your bond is only as good as what you bond to, it can't be emphasized enough that the surface must be sound stable and free from contaminants especially dust, and if you're installing over wood-framed or steel stud walls, they will most likely require additional blocking to resist deflection and impact glass is a very fragile finish and needs additional support to resist cracking. When you're installing over wood joists, a non bonded wire reinforced mortar bed would be the best method to add rigidity to the substrate. Another issue to consider is for transparent and translucent tiles variations in the substrates color or absorption rate can show differences through the tile. If patching is required, patch the entire surface and allow it to dry sufficiently before installing tile.
2. Choose the appropriate thinset and use it correctly
Glass tile has become a very desirable material for designers and homeowners, they want the clean transparent and vibrant look of glass. When these tiles are clear or transparent and especially when they're smooth, they pose additional installation challenges. The glass backsplash tile has a smooth surface, it's important to use a premium high-performance thinset mortar which has a higher polymer content to achieve a strong chemical bond to install these glass tiles, particularly some of the larger ones.

When setting traditional ceramic tile, the color of a thinset mortar is generally not a concern. However, with transparent or translucent glass, the mortars seen right through the tile if the color varies in the mortar, so does the shade of the glass tile to help eliminate variations across an installation of glass tile kitchen. In a typical ceramic tile installation, you spread a thin set mortar on the surface with a notched trowel, pressing the ceramic tile into the mortar with a back-and-forth motion, this sliding motion helps to collapse the ridges and improve the contact between a tie and the thinset mortar.
The industry-standard is to achieve contact to at least 80% of the back of the tile, but this can leave many voids in the mortar behind the tile, it's not normally a problem for ceramic tile, but these voids are visible through transparent or translucent glass. Air pockets or voids in ordinary mortar are also randomly distributed throughout the installation and can cause a distraction from the beauty of the glass to avoid air spaces behind the tile. The proper installation method is to trial the specifically formulated glass tile thin set mortar on the substrate with a notched trowel, but this time knock down the ridges, then spread or back butter and even thin film about a sixteenth of an inch thick onto the back of the clear glass tile, these two mortared surfaces are pressed together with a back-and-forth motion to eliminate any voids.

3. Lay the glass tiles for backsplash
Starting with your bottom row of tiles, apply tiles to the thin-set. Press and wiggle each tile to set into the mortar, keeping each flat, plumb and level. Use 1/8-inch spacers to keep a consistent space between tiles as you go. You can pull out the spacers when the mortar starts to dry. Add accent tiles or liner bars where you designed them. Keep an eye on vertical and horizontal lines and use the level to keep you honest.
4. Cut and polish glass tiles
Cut tiles as needed. You will likely have a space that does not perfectly fit the tiles that you have, create a need for only a portion of a tile. In order to fill these gaps, you will need to cut the tiles to size. You will need to use a wet saw with a blade designed for glass in order to cut glass tiles. Set the tile stop to the correct width, put the cutting blade down and score the tile with one smooth motion. Pull down the handle to snap the tile into two pieces. If the cut end tiles are to be exposed, polish the cut edges with a grinding stone to give the tiles a more finished look.
5. Select the right grout for glass tile backsplash kitchen
After your thinset for glass tile is fully set, you're now ready to start grouting. The acceptable type of grout may vary, so check the manufacturer's directions and recommendations specifically for opacity and exposure to water, be sure the grout you choose will not scratch the surface of the glass. And after grouting, if you leave any grout haze on the surface, assure any cleaners you use are approved for use over glass.
6. Always install movement joints
When failures occur in kitchen glass tile installations, they are typically due to expansion from exposure to heat. Either from sunlight or from steam, the coefficient of thermal expansion and physical strengths of glass tile are very different from porcelain tile or concrete. High-performance inset mortars and grouts will absorb some of this movement. However, it's more critical with glass tile to incorporate soft movement joints in the assembly, this will allow space for the tile to expand as it's heated and help prevent cracking in the glass from compression.


 16
16


- 8