EN
EN FR
FR PT
PT AR
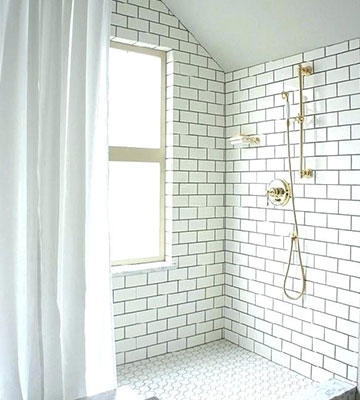
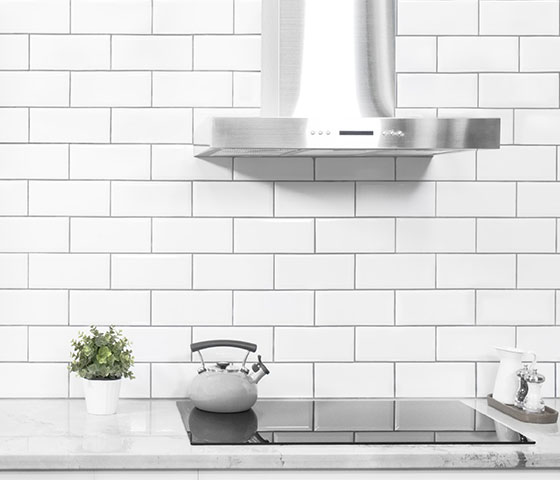
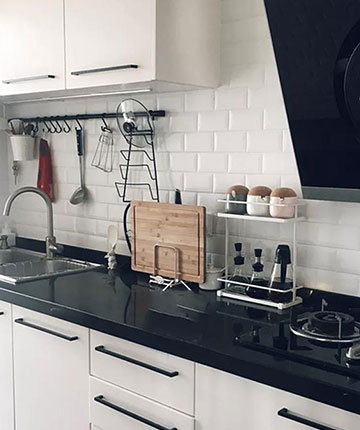
ARIn this article, you will learn exactly how to grout subway tile shower to perfection. I'm going to talk about which grout to use and why. I will present you a step-by-step guide on how to grout subway tile bathroom shower and include a whole bunch of useful tips that are gonna save you time make the job go easier and give you better results. Whether you are grouting the shower wall in a bathroom, a backsplash in a kitchen, or just a wall somewhere else in the house, this is the process you will want to use to get a professional result without the frustration.
Which Grout To Choose For Subway Tile And Why?
The cement grout and epoxy grout are the two common materials for shower tile grouting. But there are some differences between them. The cement based grout is inexpensive, easy to apply and looks great, there is only one downside that it needs to be sealed. Epoxy grout is impermeable, stain-resistant, chemical resistant, mod-resistant. It also has some disadvantages: expensive, more difficult to apply, more time consuming to apply, can discolor with sun exposure and has plastic look. Due to all these reasons, I recommend using a cement grout for subway tile and I will give you a tutorial on applying cement based grout. For more details please check: Epoxy Grout Vs Cement Grout For Tilling- What is The Difference Between Epoxy Grout & Cement Grout
Should You Use Sanded Versus Or Non Sanded Grout For Subway Tile Grouting?
The next thing to consider is a sanded versus or non sanded grout. Some grout has sand added to it, some grout doesn't have sand added to it. Now for most subway tile, you're going to use a non sanded cement based ground, that's because you're going to have small grout joints of less than an eighth of an inch in most subway tile installations. And the non sanded grout is going to be easier to work into those joints and it's going to stick better on a vertical surface without trying to droop down. So you want to go typically with a non sanded grout. In some cases if you had larger grout joints that were larger than an eighth of an inch or if you were grouting floor tile and for some reason had subway tile on the floor which doesn't really usually make sense, then you might use a sanded grout in that situation, you just have to be careful because on a lot of these shiny ceramic tiles, a sanded grout is actually going to scratch the surface and obviously that's not gonna look very good. So as long as your ground joints are less than 1/8 of an inch, you're gonna want to go with a non sanded cement based grout. That's ideal for small grout joints on vertical surfaces.

Step-By-Step Guide On How To Grout Subway Tile Shower
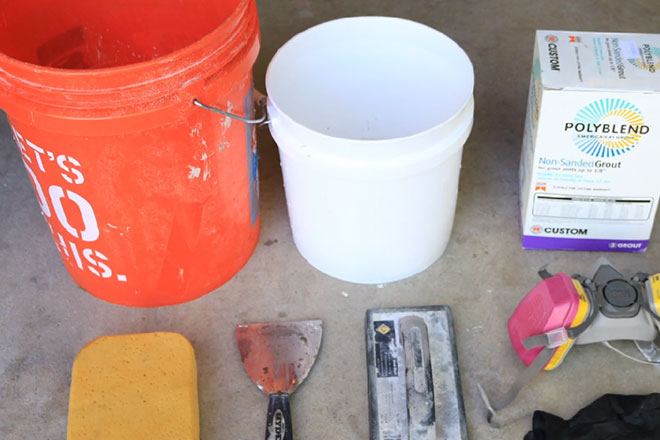
- The first step to grout subway tile bathroom is to mix the grout to the right consistency. You'll want to make sure the tile is clean and the thinset has had time to cure for at least 24 hours. When mixing grout, always add the water first.
- Then have the grout to the water and mix until you reach the desired consistency. You'll want to pay special attention to getting the right consistency because it will make the job go faster.
- Mix it for a few minutes, let it sit to slake for 10 minutes, then mix it again for a few minutes before using it and just like with thin set, you never want to add more water once you've let it sit to slate because it will weaken the grout.
- Using a putty knife or a drill with a paddle mixer to mix the grout as long as you run it at a slow rpm. Mixing grout too fast can actually mess up the color of the grout.
- You'll need a tool called a float which is designed specifically for applying grout, you'll also need a bucket with clean water and a brand new clean sponge to apply the grout scoop up some grout with the float and wipe it on the wall. Then push it into the joints by holding the float at a shallow angle and wiping diagonally across the wall. You'll want to push the grout in from multiple directions, so that the joints get completely filled with grout.
Many people recommend making upside-down X's if you hold the float at a shallow angle, it's going to leave grout on the tile and push grout into the joints. When you hold the grout at a sharp angle you'll see that it removes grout from the tile surface. So first you'll hold it at a shallow angle to push the grout into the joints.
- Then once an area is covered, wipe off excess grout by holding the float at a sharp angle. Go back with a clean damp sponge to remove excess grout and clean up the grout joints. This is the step that will determine how consistent your grout joints are and therefore how professional your grouting will look.
- Make your sponge to be damp but not wet to the point, it is dripping water otherwise you risk adding too much water back into the grout and weakening it, so wring out the sponge really well before wiping the walls and rinse it often to keep it clean and effective depending on how wet you mix the grout and how long you let it sit before you wipe with a sponge. The grout will either be very easy to manipulate with a sponge or it may be a little bit harder, so adjust your wiping technique to accommodate so that you create consistent grout joints.
- One more thing avoid applying grout to inside corners where a wall meets another wall, if you get a little bit of grout in there you can easily wipe it out before it hardens. After wiping the walls with a sponge, wait at least three hours and then go back and wipe off any haze with a clean dry cloth and the grout is ready to seal.
So how long will it take to grout a subway tile shower? It might take a pro about an hour but expect it to take you several hours to complete because you'll be doing it in stages (Check some subway tile bathroom shower ideas). Once you finish grouting your tile you're gonna want it, let it cure for 48 to 72 hours, then you're gonna want to go back and apply a penetrating sealer to it.


 16
16