EN
EN FR
FR PT
PT AR
ARDo You have an ugly broken/chipped tile in your bathroom and you don't want to replace the floor? Today I'm going to share a construction cheat with you so that if you end up chipping one of your existing tiles and you don't have any more of those around, there is a way to repair it. Follow these steps to repair it and save your money!
What Causes Chips On Ceramic Tile Bathroom?
The common causes of ceramic tile chips are nothing more than the following.
- The quality of the ceramic tile itself is poor, and the hardness is not enough. During the use, the load is too large, which causes chips.
- Caused by blunt impact of foreign objects, such as cracks or gaps caused by heavy objects hitting or hitting tiles.
- The third is that the tiles caused by the deformation of the wall have cracks of different lengths and widths.
- There is no gap between the tiles when laying the tiles, and the tiles are squeezed against each other, which is prone to cracking, hollowing or falling off.
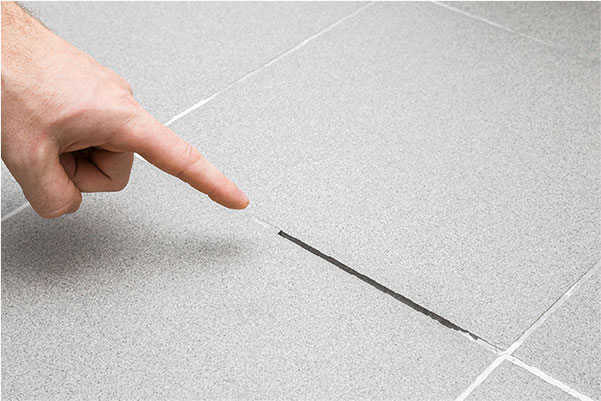
Bathroom Tile Chip Repairs - How Do You Repair A Chipped Bathroom & Shower Tile
1. Apply Toothpaste Or Tile Grout Sealant
Regardless of the cracks or chips caused by any reason, they should be repaired as soon as they appear, so as to prevent the cracked surface from becoming larger and larger and eventually cannot be repaired. Only the chipped surface can be removed to replace the ceramic tile, resulting in greater losses. There are many ways to repair the chips on tiles bathroom, the simplest is to use toothpaste, squeeze out a small amount of toothpaste and evenly apply to the cracks. If the chips are colored tiles, you need to use the corresponding color toothpaste. After adding the color, fill the gap. You can also use professional ceramic tile grout sealant or use glass glue to repair chips on bathroom tiles.
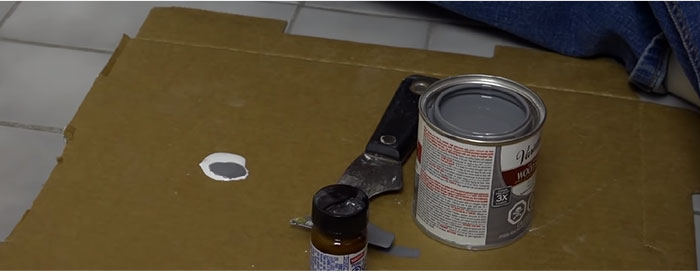
2. Use Porcelain Glaze
When you go to the hardware store you can actually buy porcelain glaze and you go down to the subsection and usually have a little display comes in a little white box and they have all the different manufacturers that they carry and they have a porcelain glaze, what they don't have is grey, so then you go to the paint department and you buy a can of grey stain and you had a couple of tools in the cardboard box and you mix all these together. Both of these are oil base, so I have great tile I grab the gray stain, if you have a different colored tile you can go to your paint department. You can get some oil-based paints and all your different colors and you basically take your paint and you mix it up with your glaze until you have something that looks a lot like your floor tile.
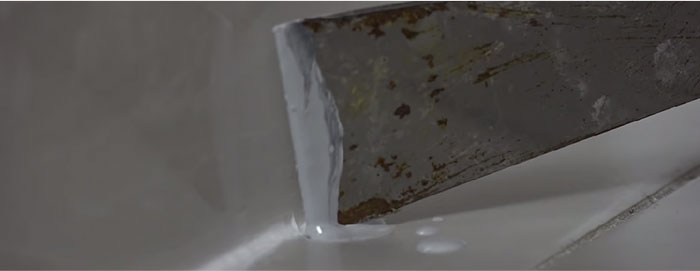
You want to just use your little tool go right up to the edge where that chipped off the glaze, so you getting the color of the stone and the glaze. If there's too much of it just take your flat tool, pull it back. The only thing left while it's still nice and we take a little bit of a paper towel and just buff in the area around the stone that's not included with the chip.
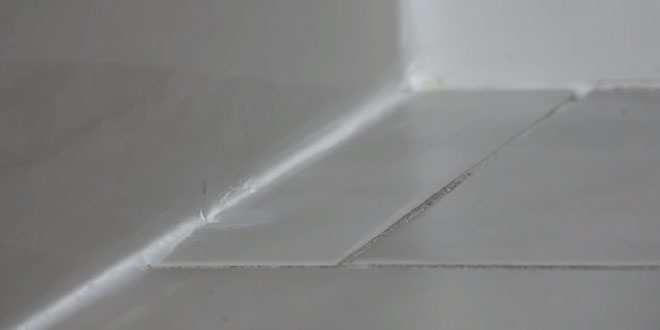
Maybe it’s not perfect but it is a lot better than that chip that was there before, a little bit off tile glaze kit here, it comes with the little handy dandy piece of sandpaper and what you do is give this about an hour, let it dry, come back and you can sand it down nice and smooth, and if you like you can mix a couple more colors at this point, put it in a little bit of a darker color and you can mix up. You can even get an artist brush, and you can just dab in a little bit of that two-tone texture on there and you can spend as much time and energy as you like as many coats as you like just make this serious and between coats, when you finally get the one you're looking for, just walk away. Now you're sealed up the net floor is waterproof again!


 16
16