EN
EN FR
FR PT
PT AR
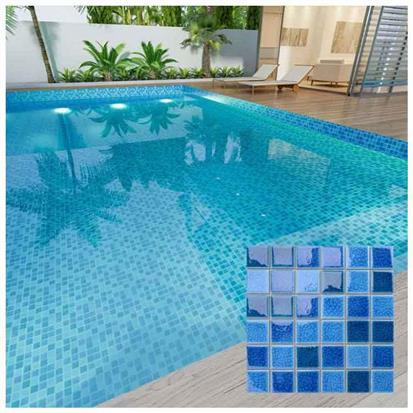
ARIn the home decoration, many families will choose to lay marble tiles for countertops, whether it's on bathroom countertop or the kitchen countertop, marble tiles can be seen everywhere, as it’s very convenient to clean up and has a very good decorative effect. Then how to install marble tile kitchen & bathroom countertops with low budget? What should you pay attention to when laying marble tile countertops in bathroom & kitchen? Here hanseceramictile brings a step-by-step guide on how to install marble tile countertops in proper ways.
How To Install Marble Tile Countertops In Bathroom & Kitchen - Cheap Marble Tile Countertop Installation
Tiling your bathroom or kitchen counter creates a multipurpose work space. Follow the bathroom & kitchen marble tile countertops installation step-by-step guide, using basic tools that you probably already have at home.
1. Remove the existing countertops and level the cabinets
The first step for marble bathroom/kitchen countertop installation is to remove the old countertops then make sure your cabinets are flat level and secured firmly to the wall. A flat surface is critical because stone countertops are rigid and will crack if they're forced to flex. If your cabinets are not flat and level small adjustments can be made later, using shims under the countertop. In some cases, you may need to remove and reinstall the cabinet's.
2. Measure for marble countertops in kitchen/bathroom
Once the cabinets are flat and level, the next is to create a wood template, carefully measure the top of the cabinets and use those measurements to cut the wood template out of 5/8″ inch thick plywood, then test fit the plywood template and make additional cuts until it fits the countertops perfectly. This wood template should extend from the wall to the edge of the countertop and will act as both a template and a support for the final installation of the stone countertop.

3. Use the template to market the marble for cutting
Then use the plywood template to mark the marble for cutting, be sure to consider the fabricated edges of the marble which will need to overhang the plywood and the cabinets. You're also going to want to mark the sink hole as well and a side note be sure to get prefabricated marble which has already been polished on the edges, otherwise the project will get much more complicated.
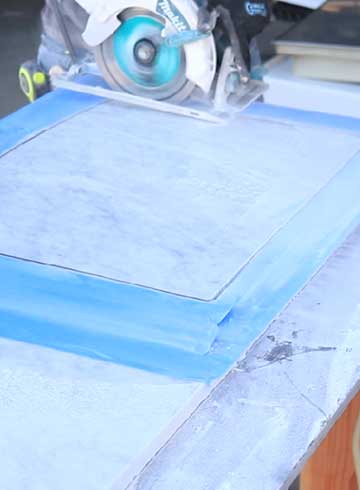
4. Cut marble tile countertops with a diamond blade
Then, it's time to make some cuts. Use a turbo diamond blade to cut the marble quickly and cleanly, you can use an angle grinder if you want but a circular saw with a bigger blade will cut faster and stay cooler. Cutting thick stone takes a lot of time, so go slow and don't force it, just apply consistent pressure and let the blade do the work, otherwise you'll burn up your blade. After that, putting water on it can help you cut the tile faster and reduce a lot of dust if you want to go ahead and add some water in there, a respirator ear protection and eye protection are essential for cutting any kind of stone like marble, so make sure you have the proper safety equipment on hand. Read more details for tile cutting: How To Cut Tile – 4 Ways To Cut Ceramic Tile, Glass Tile, Granite Tile

If you want to cut the sink hole before the installation, you need to carefully measure that out and position it. Using the wood template as your tester and then go ahead and cut that out of the marble as well and be careful while cutting the inside corners, because if the blade grabs it can pull the saw right across the top of the countertop and end up ruining the entire countertop and it's definitely helpful to have a small angle grinder with a diamond blade on it to help you cut these small inside corners, and once you've cut through the majority of the marble, you can give it a few taps with the rubber mallet to break it free, so you can go ahead and lift it out.
5. Lay marble bathroom countertop tile
Once all your cuts are done, it's time to begin the marble tile countertop installation for bathroom & kitchen.
First, screw down the 5/8 inch thick plywood template to the cabinet's, using 1 5/8” screws or 2” screws. use shims if the cabinet's aren't perfectly level.
Next, dryfit the marble tile to make sure it fits the countertop, be careful and keep this stone well supported while moving and positioning it, set the back of the countertop into place first while holding it vertically, then slowly lower down the front until it makes contact with the cabinet's, you want to aim for the marble to be as tight against the wall as possible in all areas that will be visible.

6. Glue marble tiles kitchen & bathroom countertops
Once the installation is completed, however the backsplash will cover the edge against the wall so that doesn't need to be perfect. If it doesn't fit, make some cuts keeping the mine crooked or out of square walls. Once the countertop has been dry fit successfully, take it back off of the cabinets and use the caulking gun and a tube of silicone to generously apply silicone to the entire surface of the plywood, then carefully move the counter top back in place and it all set. The silicone will act as an adhesive and a cushion to ensure even contact with the plywood.
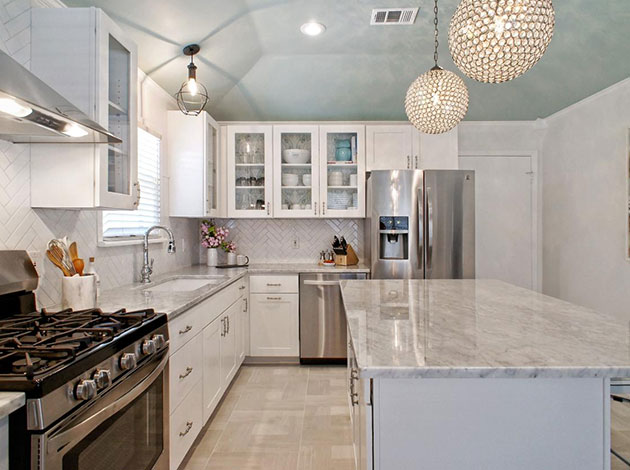
7. Install the backsplash
Then it’s time to install the backsplash. You can either use some matching stone as a backsplash which typically comes with these prefabricated countertops or you can use something else.
8. Install the sink
And lastly, go ahead and caulk any edges up against the wall. Once you install the sink you can step back and enjoy your hard work.


 16
16